
https://kopia.io is for fast and encrypted backups – with a secure and scalable architecture, Kopia can back up everything from small laptops to large servers.
In this tutorial, we will install kopia server instance and configure an example backup job running in cron on a Linux VM and configure the MacOS backup job using kopia.io UI client.
Running kopia.io server
We will run kopia.io in a Docker container, using self-signed certificates. We start with creating some directories on the host, for kopia configuration and for the local, filesystem repository.
In our example, the base directory for kopia server configuration is /docker/kopia-server, and the base directory for backup snaphots is /kopia-snapshots. Create the following directories:
/docker/kopia-server/config/docker/kopia-server/cache/docker/kopia-server/logs/docker/kopia-server/certs/kopia-snapshots
Next, let’s start the docker container with the server:
docker run \
--name=kopia \
--hostname=kopia \
--volume=/docker/kopia-server/config:/app/config \
--volume=/docker/kopia-server/cache:/app/cache \
--volume=/docker/kopia-server/logs:/app/logs \
--volume=/docker/kopia-server/certs:/certs \
--volume=/kopia-snapshots:/kopia \
-p 51515:51515 \
-p 51516:51516 \
-e TZ=Europe/Warsaw \
-e KOPIA_PASSWORD=your-local-repository-password \
-e KOPIA_PERSIST_CREDENTIALS_ON_CONNECT=true \
--restart=unless-stopped \
--detach=true \
kopia/kopia:latest server start \
--disable-csrf-token-checks \
--log-level=info \
--address=0.0.0.0:51515 \
--server-username=kopia-server-username \
--server-password=kopia-server-password \
--enable-actions \
--tls-cert-file /certs/my.cert \
--tls-key-file /certs/smy.key
--tls-generate-cert \
--tls-generate-cert-name=your.kopia.domain.url.local
When started, kopia creates a local filesystem repository where all the backups go. You need to provide the repository password with the KOPIA_PASSWORD variable. The credentials for accessing the kopia-server web UI are provided with --server-username and --server-password command line switches to the executable.
Note the last two command line switches: –tls-generate-cert and –tls-generate-cert-name. This for the self-signed certificate created for the your domain. When we start the container for the first time, kopia will generate these certs in the /certs mapped directory (/docker/kopia-server/certs in our example).
Let’s stop kopia using docker stop command and execute it again, this time without generating the certificates:
docker run \
--name=kopia \
--hostname=kopia \
--volume=/docker/kopia-server/config:/app/config \
--volume=/docker/kopia-server/cache:/app/cache \
--volume=/docker/kopia-server/logs:/app/logs \
--volume=/docker/kopia-server/certs:/certs \
--volume=/kopia-snapshots:/kopia \
-p 51515:51515 \
-p 51516:51516 \
-e TZ=Europe/Warsaw \
-e KOPIA_PASSWORD=your-local-repository-password \
-e KOPIA_PERSIST_CREDENTIALS_ON_CONNECT=true \
--restart=unless-stopped \
--detach=true \
kopia/kopia:latest server start \
--disable-csrf-token-checks \
--log-level=info \
--address=0.0.0.0:51515 \
--server-username=kopia-server-username \
--server-password=kopia-server-password \
--enable-actions \
--tls-cert-file /certs/my.cert \
--tls-key-file /certs/smy.key
Configuring usernames and passwords
For configure users and their passwords you need to execute the command in the container. For example, to create a test@selfhostblog user, execute the following and the provide the password:
docker exec -it kopia /usr/bin/kopia server users add test@selfhostblog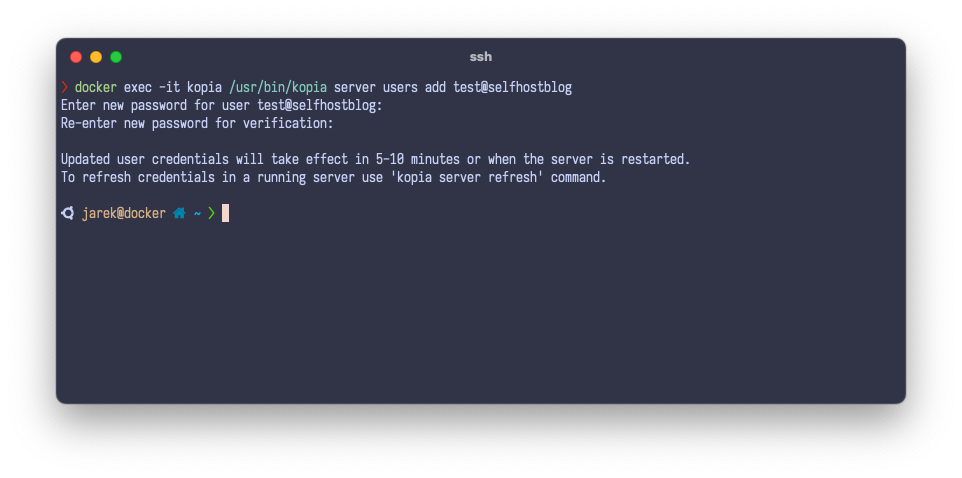
Next, you need to restart the server using the docker restart kopia command, or wait 5-10 minutes.
Configuring the Linux client
First, you will need to install kopia-server certificates on the Linux host that you would like to backup. Transfer them from the /certs directory and install on the host. Follow the guide here https://ubuntu.com/server/docs/security-trust-store for example.
Install the kopia-cli on the hosts, by following the guide here https://kopia.io/docs/installation. On Ubuntu, execute the following:
curl -s https://kopia.io/signing-key | sudo gpg --dearmor -o /etc/apt/keyrings/kopia-keyring.gpg
echo "deb [signed-by=/etc/apt/keyrings/kopia-keyring.gpg] http://packages.kopia.io/apt/ stable main" | sudo tee /etc/apt/sources.list.d/kopia.list
sudo apt update
sudo apt install kopia
Next, connect to the kopia-server, executing the following, and providing your repository password:
kopia repository connect server --url https://your-kopia-server-domain:51515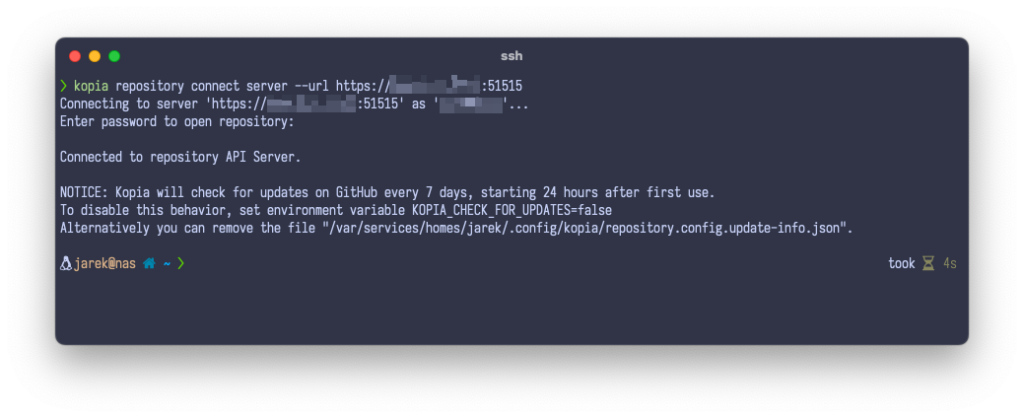
Repository is now connected, the configuration gets saved in the current Linux user profile. From now on, you can now create snapshots, by executing for example:
kopia snapshot create /directory-i-would-like-to-snapshotConfiguring the MacOS (or Windows) UI client
My recommended approach for installing kopia-ui on MacOS will be via the brew package manager:
brew install kopiauiWindows installer of KopiaUI is available on the releases page. Simply download the file named KopiaUI-Setup-X.Y.Z.exe(where X.Y.Z is the version number), double click the file, and follow on-screen prompts.
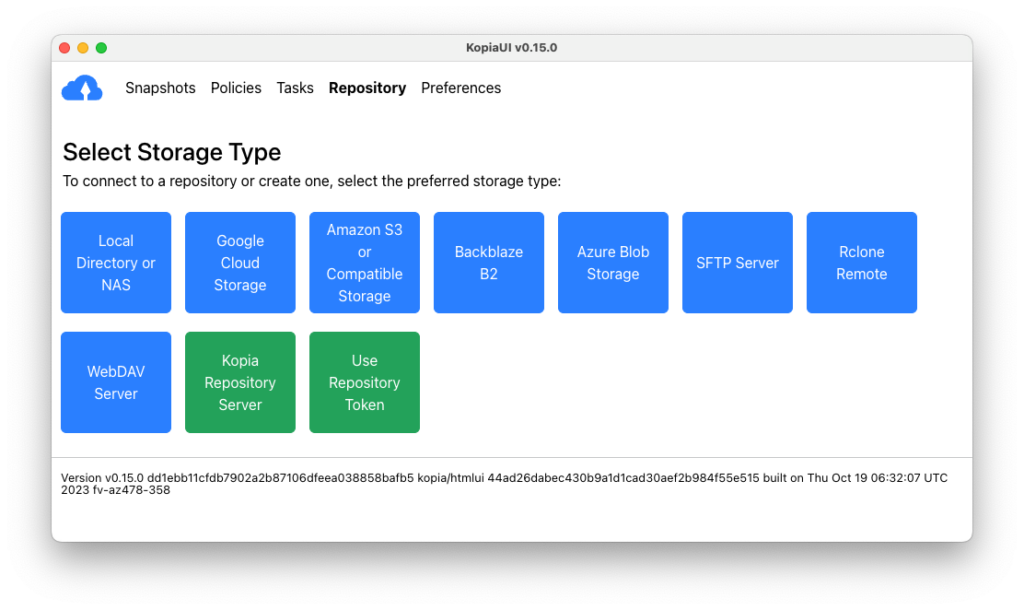
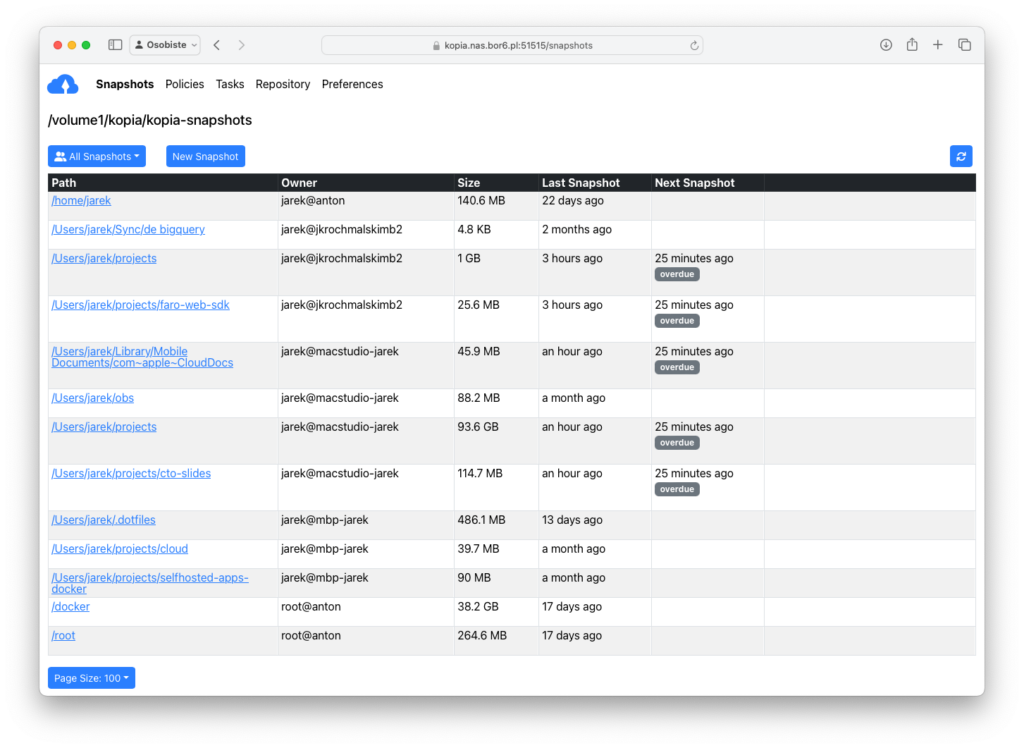
Install the kopia-ui client and click Kopia Repository Server when prompted for the Storage Type. Add your server URL, for example https://your-kopia-server-domain:51515. The UI of the MacOS and WIndows client is identical to the kopia-server web UI. Let’s see how we can browse snaphosts on the server UI.
Using the server web UI
Open the web browser on your server kopia URL, using port 51515:
Next
This is just a plain & dirty, very simple example how to start with kopia.io for backing up your machines on the server. This is the list of things you should consider doing next:
- setting up the reverse proxy, so you don’t need to use ports in the URL and hide your services behind the nice URL. You may use Traefik with our tutorial.
- setting up cron jobs that will execute snapshots on your hosts using intervals
- exploring the policies of kopia-server and changing settings like compression or encryption.
- exploring other storage types for off-site backups, like: Amazon S3 and S3-compatible Cloud Storage, Azure Blob Storage, Backblaze B2, Google Cloud Storage, Google Drive.
Summary
Kopia is an open-source backup and snapshot tool designed for managing backups in a secure and efficient manner. It’s extremely fast. Supports features like deduplication, encryption, compression, and the ability to store backups in various storage backends, including local storage, cloud storage (such as AWS S3 or Google Cloud Storage), and more.
source: