
Traefik is a dynamic, open-source reverse proxy that simplifies the task of routing and securing network traffic to services, including these running on Docker. With its automatic discovery of services and robust security features, Traefik provides an efficient solution to protect your Docker services. Traefik is can handle every major technology, like Docker, Docker Swarm, Kubernetes, AWS, Mesos, Marathon, and so on. Also legacy software running on bare metal.
In this article, we will explore how to leverage Traefik to secure your Docker services, diving into its key features, setup process, and practical examples of its use.
We will setup a Vaultwarden instance, generate Let’s Encrypt certificate for it using the DNS Challenge method and expose the application under a nice URL, so you can access it via HTTPS. Even as a local service, which is not reachable from the outside Internet. No more self-signed certificates, that you need to trust on every machine!
Vaultwarden is an alternative implementation of the Bitwarden server API written in Rust and compatible with all Bitwarden clients. It’s a perfect vault implementation for self-hosted deployment where running the official resource-heavy service might not be ideal (we will cover Vaultwarden in details on http://www.selfhostblog.com soon).
We’ll need:
- docker running on the host, obviously
- a domain name – this can be configured at your domain provider or locally, using the local DNS server like pihole or AdGuardHome.
- a domain provider, which supports the DNS challenge – if you want local services running on docker to have a valid Let’s Encrypt certificate.
Table of Contents
Create directories
We’ll need a directory for Traefik configuration file and generated SSL certificates and also a directory for the service which we are going to protect with SSL and a Let’s Encrypt certificate (Vaultwarden in our example).
While Traefik can be configured from the command line, I think the YAML configuration is much more convenient. Create directories that your docker instance has access to, for example:
/docker/traefik/docker/traefik/etc/docker/vaultwarden
Creating a docker network
For Traefik to communicate with the service without the need of exposing this service port(s), we’ll run both Traefik and a docker service on the same network, named traefik in our example. Create the bridge network by executing the following:
docker network create traefikBasic concepts in Traefik
Before we configure Treafik and later to the Traefik UI, let’s get to know some basic concepts in Traefik. These will be entrypoints, routers and services. Vaultwarden is our service that we expose on https entrypoint, using the vault.yourdomain.com router.
- Entrypoints – are the network entry points into Traefik. They define the port which will receive the packets, and whether to listen for TCP or UDP.
- Routers – they connect requests incoming from entrypoints to the services that can handle them (in our example, applications running in Docker). In the process, routers may use pieces of middleware to update the request, or act before forwarding the request to the service.
- Services – responsible for configuring how to reach the actual services that will eventually handle the incoming requests.
Now when we know basic concepts, let’s create a configuration for the Traefik.
Traefik configuration
Create the file named traefik.yml and save it in a directory docker has access to, for example /docker/traefik/traefik.yml
## STATIC CONFIGURATION
global:
  checkNewVersion: false
  sendAnonymousUsage: false

log:
  level: DEBUG

api:
  insecure: true
  dashboard: true

entryPoints:
  web:
    address: ":80"
    http:
        redirections:
          entryPoint:
            to: websecure
            scheme: https
            permanent: true
  websecure:
    address: ":443"
  grpc:
    address: ":8090"

# HTTPS endpoint, with domain wildcard
https:
  address: :443
  http:
    tls:
      certResolver: letsencrypt
      domains:
        - main: yourdomain.com
          sans:
            - '*.yourdomain.com'
    middlewares:
      - securityHeaders@file

providers:
# Docker provider for services running on the docker network
  docker:
    watch: true
    exposedByDefault: false
    defaultRule: Host(`{{ normalize .Name }}.yourdomain.com`)

certificatesResolvers:
  letsencrypt:
    acme:
      email: youremail@gmail.com
      storage: /etc/traefik/acme.json
      dnsChallenge:
        provider: ovh
        delayBeforeCheck: 10
We have configured two entryPoints – web (listing on port 80) and websecure (listening on port 443). The web entrypoint will automatically redirect to a websecure entrypoint on port 443.
There’s one provider configured: docker, with exposedByDefault set to false, so Traefik will not expose all of our docker containers automatically. We will need to specify container which we want to be exposed later, using Docker label.
Last but not least, we have one certificatesResolver configured, which is Let’s Encrypt with a dnsChallenge.
Setting up the DNS challenge
The Let’s Encrypt certificates for services that are exposed on the internet can be created without the DNS challenge. However, in this tutorial we’ll generate certificates for internal services (not exposed on the Internet), so you can have a proper HTTPS and don’t need to use self-signed certificates. It means you don’t need to add them as trusted on every machine you use.
Because the internal services are not reachable from outside, we’ll use the DNS Challenge method. This method will vary depending on the provider you use. The names of the variables we’ll need to define will be different for each provider.
Refer the list of providers and replace all the environment variables. In the example below, we are using the OVH provider. OVH application key and secret can be created by following the OVH guide.
Having the DNS challenge variables ready, let’s run Traefik in Docker.
Running Traefik
docker run \
  --name=traefik \
  --hostname=traefik \
  --network=traefik \
  -p 443:443 \
  -p 80:80 \
  -p 8080:8080 \
  --volume=/var/run/docker.sock:/var/run/docker.sock:ro \
  --volume=/docker/traefik/traefik.yml:/traefik.yml \
  --volume=/docker/traefik/etc:/etc/traefik \
  --restart unless-stopped \
  --detach=true \
  -e OVH_ENDPOINT=ovh-eu \
  -e OVH_APPLICATION_KEY=yourOvhApplicationKey \
  -e OVH_APPLICATION_SECRET=yourOvhApplicationSecret \
  -e OVH_CONSUMER_KEY=yourOvhConsumerKey \
  traefik:latest \
  --log.level=DEBUG
Note, that we have exposed 3 ports above:
80and443– this is where your domain should point to. It can be configured on your domain provider page (even for local network, like for example *.yourhome.com can point to 192.168.1.10 or wherever your docker host is running)8080– for the Traefik web interface.
We map these volumes to the Traefik container:
/var/run/docker.sockto/var/run/docker.sock:ro– we will be using the Docker provider, thus Traefik needs to be able to explore running docker containers. We map this as read-only./docker/traefik/traefik.ymlto/traefik.yml– this is our Traefik configuration/docker/traefik/etcto/etc/traefik– for storing our auto-generated Let’s Encrypt certificates.
Running the service
Run the following:
docker run \
--name=vaultwarden \
--hostname=bitwarden \
--network=traefik \
--volume=/docker/vaultwarden:/data \
--restart=unless-stopped \
-env=WEBSOCKET_ENABLED=true \
-env=ROCKET_ADDRESS=0.0.0.0 \
-env=SIGNUPS_ALLOWED=false \
--detach=true \
--label traefik.enable=true \
--label traefik.http.routers.vaultwarden.rule="Host(\`vault.yourdomain.com\`)" \
--label traefik.http.routers.vaultwarden.entrypoints=websecure \
--label traefik.http.routers.vaultwarden.tls.certresolver=letsencrypt \
vaultwarden/server:latest
We are using docker labels here to instruct Traefik how to deal with this container during the runtime. Labels are:
traefik.enable=true– notices Traefik to pickup this containertraefik.http.routers.vaultwarden.rule="Host(`vault.yourdomain.com`)"– defines a rule for the router and specifies the domain on which Traefik will react, passing the traffic to the Vaultwarden instance.traefik.http.routers.vaultwarden.entrypoints=websecure– we want thewebsecureendpoint to handle this traffic (port 443). Thewebsecureendpoint is what we have configured in a previous step, in the/docker/traefik/traefik.ymlfile.traefik.http.routers.vaultwarden.tls.certresolver=letsencrypt– instructs Traefik to useletsencryptcertificate resolver, when setting up the routing. Theletsencryptresolver is what we have configured previously in the/docker/traefik/traefik.ymlconfiguration file.
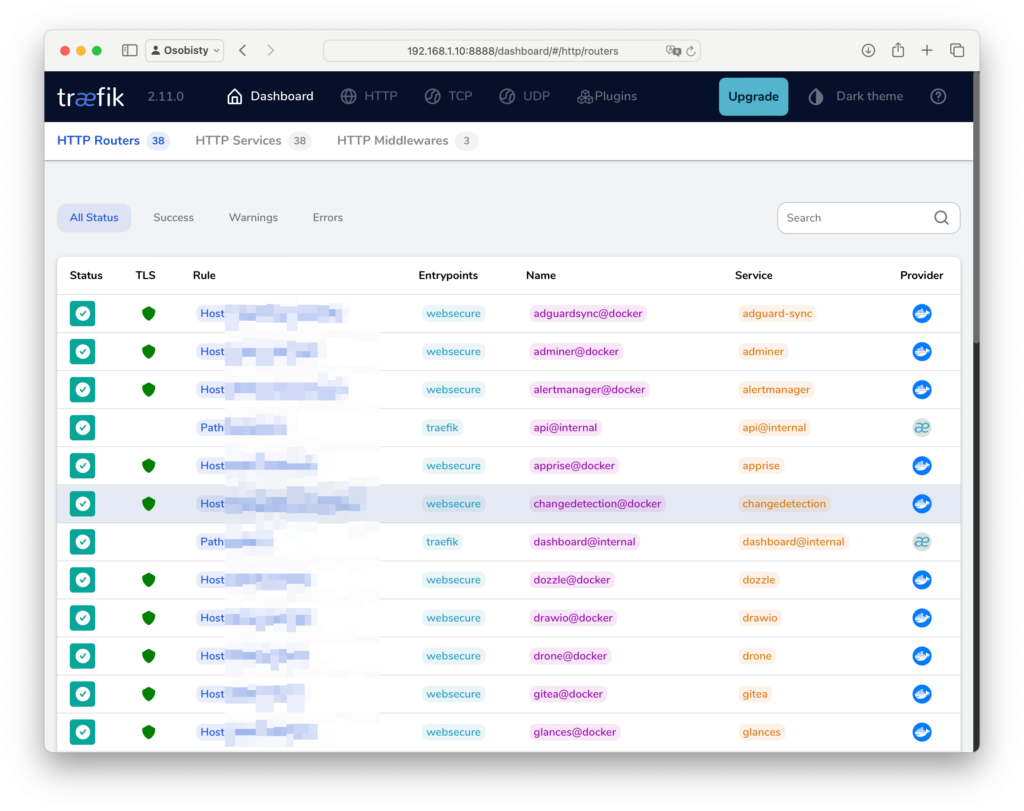
Exploring Traefik web interface
In Traefik UI, available on the port that we have exposed earlier, will list all the routers, services and middleware (if any):
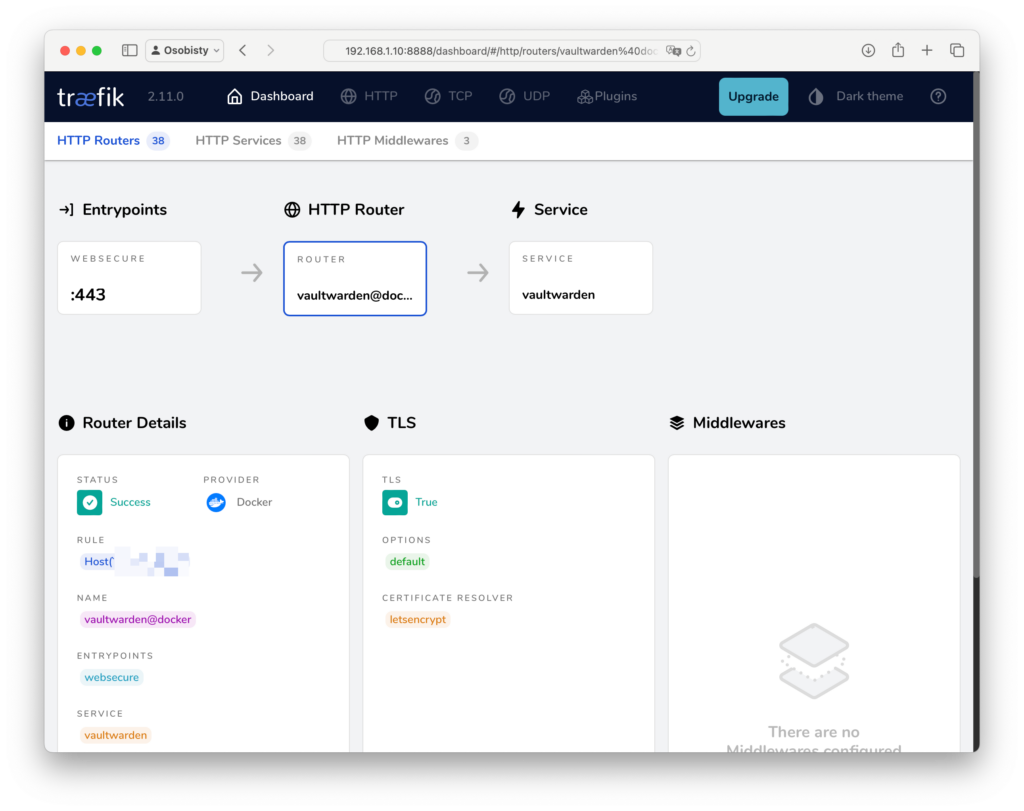
Clicking on the specific router will give you details of the configured service:
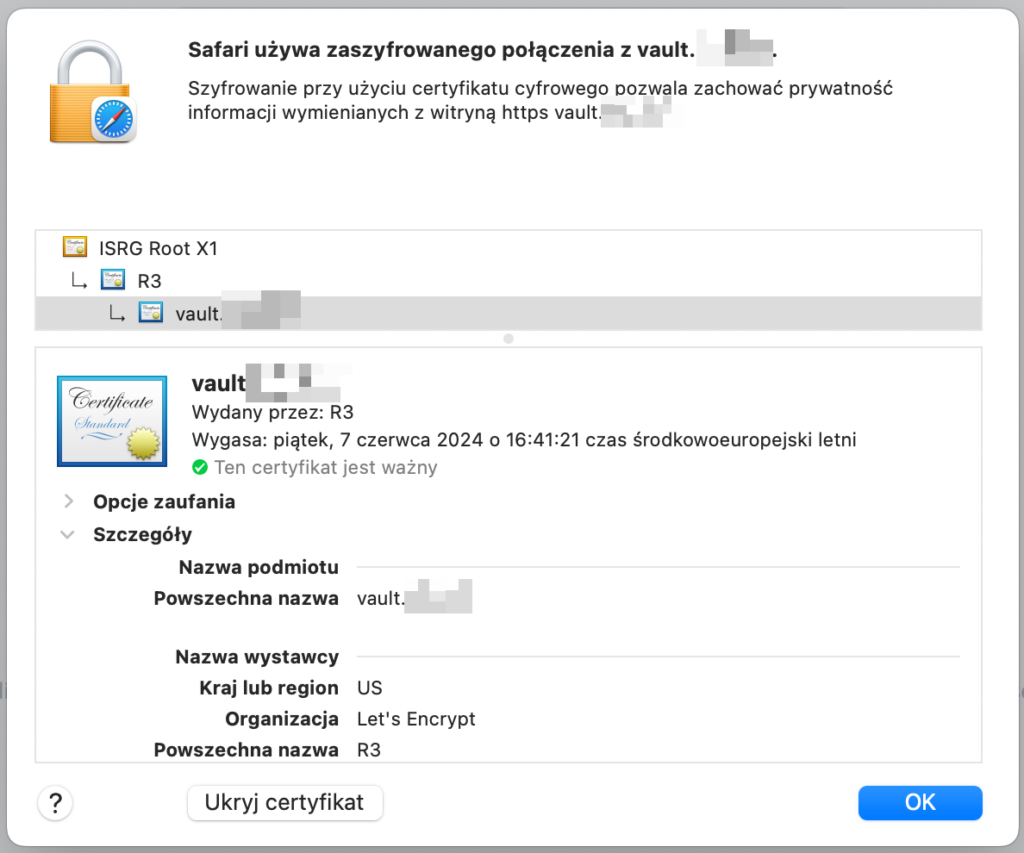
Testing the certificate
Obviously, the first thing you can do is the examination the certificate in your browser, by clicking the lock icon next to your Vaultwarden URL:
If you expose your service on the internet, there is a couple of SSL validators you can use to test your new setup, like for example:
- https://www.ssllabs.com/ssltest/ – my recommendation, validates a certificate and performs a lot of SSL related tests.
- https://www.sslshopper.com/ssl-checker.html
These services give you a nice report on how your site is SSL protected, for example:

Next
This is a quick and dirty introduction on how to protect your docker applications with Let’s Encrypt certificates automatically. Even applications that you don’t expose on the Internet can have not-self-signed certificate.
This is just the tip of the iceberg of what Traefik can do, so here’s the list of thing you should consider exploring now:
- adding different providers (like
file, for example) so you can have a reverse proxy to services running outside of Docker - exploring middlewares
- introducing observability with logs, metrics and traces.
- playing with the insane amount of Traefik plug-ins
Happy traefiking, say safe.